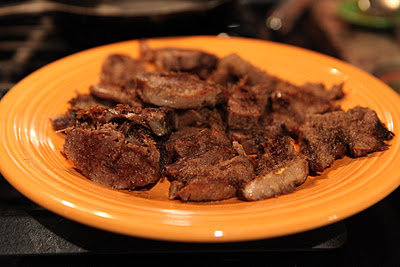
Organ meat. Lengua. TONGUE.
All of those words are enough to strike fear into the heart of the most good-intentioned traditional cook. To be completely honest, getting organ meats into our diet is something I keep putting off myself. I baby-step my way over and around it, then I start working on other steps so that I can justify my failure to include them on a regular basis. Liver…can’t quite figure out how to eat it without gagging a little bit. Heart…let’s not even go there. THEN came the day when I discovered beef tongue.
I can’t remember what first compelled me to order a grass-fed beef tongue from Conway Locally Grown. Perhaps it was the picture of the tasty-looking tongue sandwich they included. It looked a lot like a slice of roast beef. The price per pound was appealing as well when compared to a grass-fed beef roast. Either way, I have purchased and prepared many beef tongues since that original “lapse in judgment.”
The nice thing about tongue is that it is less…organish…than liver. I would compare the texture and taste of the back of the tongue to a pork roast. The front part is a little more of a unique texture. It’s softer. If you really pay attention while chewing, there seems to be a slight – albeit very slight – taste that is distinctive to tongue, but I’m pretty sure if you didn’t know any better you wouldn’t notice it. Using lots of seasoning usually covers it up nicely. I would have loved to been able to serve it the first time without my husband knowing what it was, although after reading THIS ARTICLE by Katie @ Kitchen Stewardship I might would think twice about it.
I am by no means claiming to be an expert on tongue preparation. I am merely sharing the things I’ve figured out in the short amount of time I have been serving tongue. Maybe this post will bring some expert tongue-preparers out of the closet and they will give us all some great tips.
Let’s dive in!
First of all, this is an excellent meat to prepare in the crockpot! Anyway you decide cook it, you start off by a long simmer on low heat. I cook mine for 10 hours on low in the crockpot, and you could definitely go longer, especially for a bigger tongue. It can be kind of mushy if you don’t cook it long enough. The nice thing is that there’s no prep, versus having to season and braise a roast first. You just plop the thing in there with enough water to cover it. (Bonus: It makes a nice stock.)
After it’s cooked, you need to peel all the skin off of it. Sometimes there’s a bit of a film left behind – make sure you scrape that off too. That’s the key to keeping it from having a weird texture, and to keep husbands happy and coming back for seconds.
You have several different options at this point. I’m going to show my favorite way to prepare it: Cut the tongue into slices, and season them with whatever seasonings strike your fancy at the time: cumin, paprika, chili powder are some suggestions. Heat your fat of choice in a skillet – I used refined coconut oil. Fry the pieces until they are browned on both sides. This gives it just a bit of a crisp that takes it from blah to divine! In case I haven’t stressed it enough, when cooking tongue, texture is everything!!!
Now, if the texture doesn’t bother you, you can just skip this step and shred it and eat it like roast beef with rice. Another way we like it is to shred and cook it in the skillet with taco seasonings. Serve on homemade tortillas for some amazing tacos! When you brown it like I do, it even tastes good cold out of the refrigerator. Ever heard of cold tongue sandwiches? Yum!
Alrighty then. Feel up for the challenge yet? Put on your big girl (or boy) panties, get a beef tongue from your local farmer and get to work! Who knows? It may end up being a regular family favorite!
linked to Real Food Wednesday with Kelly the Kitchen Kop, Fight Back Friday, and Monday Mania.
linked to Real Food Wednesday with Kelly the Kitchen Kop, Fight Back Friday, and Monday Mania.


